Disclaimer: While
there are links to the products I used, I do not get paid to post them, but I
put the links for the convenience of my readers.
 We've all
heard of them - and to be honest, we've all seen the Pins floating around on
Pinterest about "Easy Ways to Remove Popcorn Ceilings", but actually
removing them? It's a whole other ball game.
We've all
heard of them - and to be honest, we've all seen the Pins floating around on
Pinterest about "Easy Ways to Remove Popcorn Ceilings", but actually
removing them? It's a whole other ball game.
First and Foremost: If you're going to remove your popcorn ceilings that were
before the 1980s (realistically, people say before 1978, but I say before 1980
to be safe), get it checked for asbestos. It's better to be safe than sorry.
I did all kinds of research of how to
remove our #PopcornCeilings because they date a house (in my opinion). Some
said water and scrap, while others said hire a guy, blah, blah, blah. The
common method is to do the water and scrap method, where you wet a section of
the ceiling (preferably with a garden sprayer) and then use a large putty knife
to scrap the popcorn off, and then repeat until the ceiling is bare. A lot of
times, if you don't have patience with scrapping and the putty knife, you'll
end up gouging your ceiling... And on the off chance you don't gouge your
ceiling, the part they don't tell you about: Skimming.
 What is skimming? #Skimming is a thin coat
of mud that you can use to repair or smooth surfaces, like ceilings. So if you
have joints or have to level an area on your ceiling, which most ceilings need
it, you will have to skim after your remove the popcorn ceiling, and that takes
about 2 to 4 coats of skimming in order to get the correct desired smoothness.
What is skimming? #Skimming is a thin coat
of mud that you can use to repair or smooth surfaces, like ceilings. So if you
have joints or have to level an area on your ceiling, which most ceilings need
it, you will have to skim after your remove the popcorn ceiling, and that takes
about 2 to 4 coats of skimming in order to get the correct desired smoothness.
Oh and did I forget, skimming is an art, to an extent.
So now I was on a
mission to find a fast way to remove the popcorn ceilings, while not gouging
them, and not having to skim the entire ceiling. I found this YouTube video of
a guy using a drywall sander in order to remove the popcorn, and it's just
magical to watch: Festool Planex Popcorn Removal

I was sold. I called up my local
#HomeDepot and found that they have a drywall sander to rent for $34 for 4
hours (it's the minimum), and I was confident and ready to rock.
... And then I ran into so many problems
with my "easy fix": First off, the drywall sander says that it's
virtually "dust-free", but the one to rent at Home Depot didn't have
the attachment that suctions in the dust in order to make it dust-free so there
was a winter wonderland in our master bedroom, and all over me.

- No matter how much tarping everything is a pain in the butt (including the walls), just do it. You'll be so happy that you did. Luckily, the carpet was already pulled up and replaced by pads when we moved in, and there was no furniture in the bedroom, so letting it be a winter wonderland was fine by me. Nevertheless, tarping is a way better choice, no matter how long it takes to setup.
- I stupidly forgot safety goggles - make sure to get goggles and not glasses (they’re definitely not the same) - because I thought "dustless doesn't need googles", and man was I utterly wrong.
- I hate to admit it, but holding that drywall sander up in the air (my Home Depot rental wouldn't stay in the convenient upright position like in the YouTube video) for long periods of time, made it quite difficult to stay like that and continue to work.
Once I realized that I wasn't going to get
this done as fast, let alone, as convenient as I thought I would be able to (I
got maybe a 12-inch square done in an hour), I re-evaluated my decision... And
talked to my co-worker at the time, who does construction, and we came up with
the plan:
If it's not broke, don't fix it.
 I went back to
spray the ceiling with a sprayer and scraping with a putty knife... And boy did
it work wonders! Our master bedroom is listed as a 16x13 room and 3 1/2 hours
later, I had a beautifully clean FLAT ceiling... And a
floor of a putty popcorn mess. #TotallyWorthIt
I went back to
spray the ceiling with a sprayer and scraping with a putty knife... And boy did
it work wonders! Our master bedroom is listed as a 16x13 room and 3 1/2 hours
later, I had a beautifully clean FLAT ceiling... And a
floor of a putty popcorn mess. #TotallyWorthIt
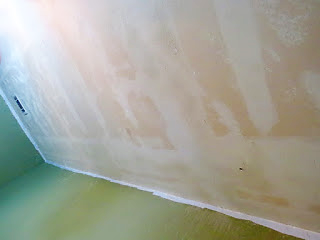
Honestly
folks, I tried every which way to scrape a popcorn ceiling - spray and scrape,
drywall sander, and regular dry-scraping - but I promise you, the spray and
scrape is the way to go. Plus, it's fun (or at least for me it was) to see
giant mounds of popcorn ceiling coming down left and right as you work. Do you
see the beauty of the flat ceiling in my picture (and
the hot mess I looked like afterwards)?! They just look so beautiful to me (not
me. The ceiling)... Here’s my step-by-step process of how I did it:
- Purchase a handy-dandy garden sprayer, like this one – me and this little guy have done some damage over these past *almost* three years, and he’s never let me down
- Get yourself a good scraper. Trust me. They’re beyond useless, and while the previous owners left theirs, so that’s what I used, this one is a solid choice
- Next you get up on a ladder, and just start spraying your little garden sprayer all over one area until water is dripping down – do not completely soak the ceiling, but make sure it’s wet
- Next, keep your scraper as level with the ceiling as possible and start scraping it along the popcorn. You don’t want to gouge the ceiling, remember, so if the popcorn doesn’t budge with your scrapper, wet the ceiling again
- You’ll find that once you can get the popcorn to budge, the scraper can move pretty fluidly under the popcorn, as long as it’s wet enough
- Now, go to town clearing that popcorn!

It’s really that simple and it turns out
so beautifully…
… Now let's talk about what's not so
beautiful: Not tarping your floors, and especially the walls. Everyone warns
you that you should do it, and you should. Want to see why?

Exactly.
Just tarp... Whatever you do.
Once all of the
popcorn is down, here is where things get real dusty. Like John Wayne in
a Western kind of dusty… After all of the popcorn is down, you’ll notice some
little rough areas, which can be easily sanded down.
Enter my best
friend in the whole popcorn ceiling removal process: #Ryobi 1.2 Amp Corded 5.5inch Corner Cat Sander. This guy and I have
done more projects than I can count! I mean, if you asked me to count, I could,
but you get the point. A lot.
I did my research
about sandpaper, which is the higher the grit, the fine the course on the
sander. Easy enough to remember… And since I didn’t want to rough up my
ceiling, but rather smooth it out, I put on it’s 220 grit sandpaper and went to
town… Or so I thought I was going to “go to town”. The 220 was too soft for the
ceiling and again, we were back to wasting my time and energy.
I reevaluated –
said a little prayer to the reno-Gods – and put a 120-grit on, and it worked perfectly. After some
sanding, I had a smooth ceiling that just needed a little sweeping to get off
the excess dust, and then it was ready for it’s paint.
Anyway, the next thing to do on my list of
renovations is staining leather chairs. Yes. It is possible ladies and gentlemen.
Sarah
#MeAndVinny
Comments
Post a Comment
Want to show us some love? Have an opinion on how we could've done it better? Got a question? Leave a comment below, because we'd love to hear from you.